
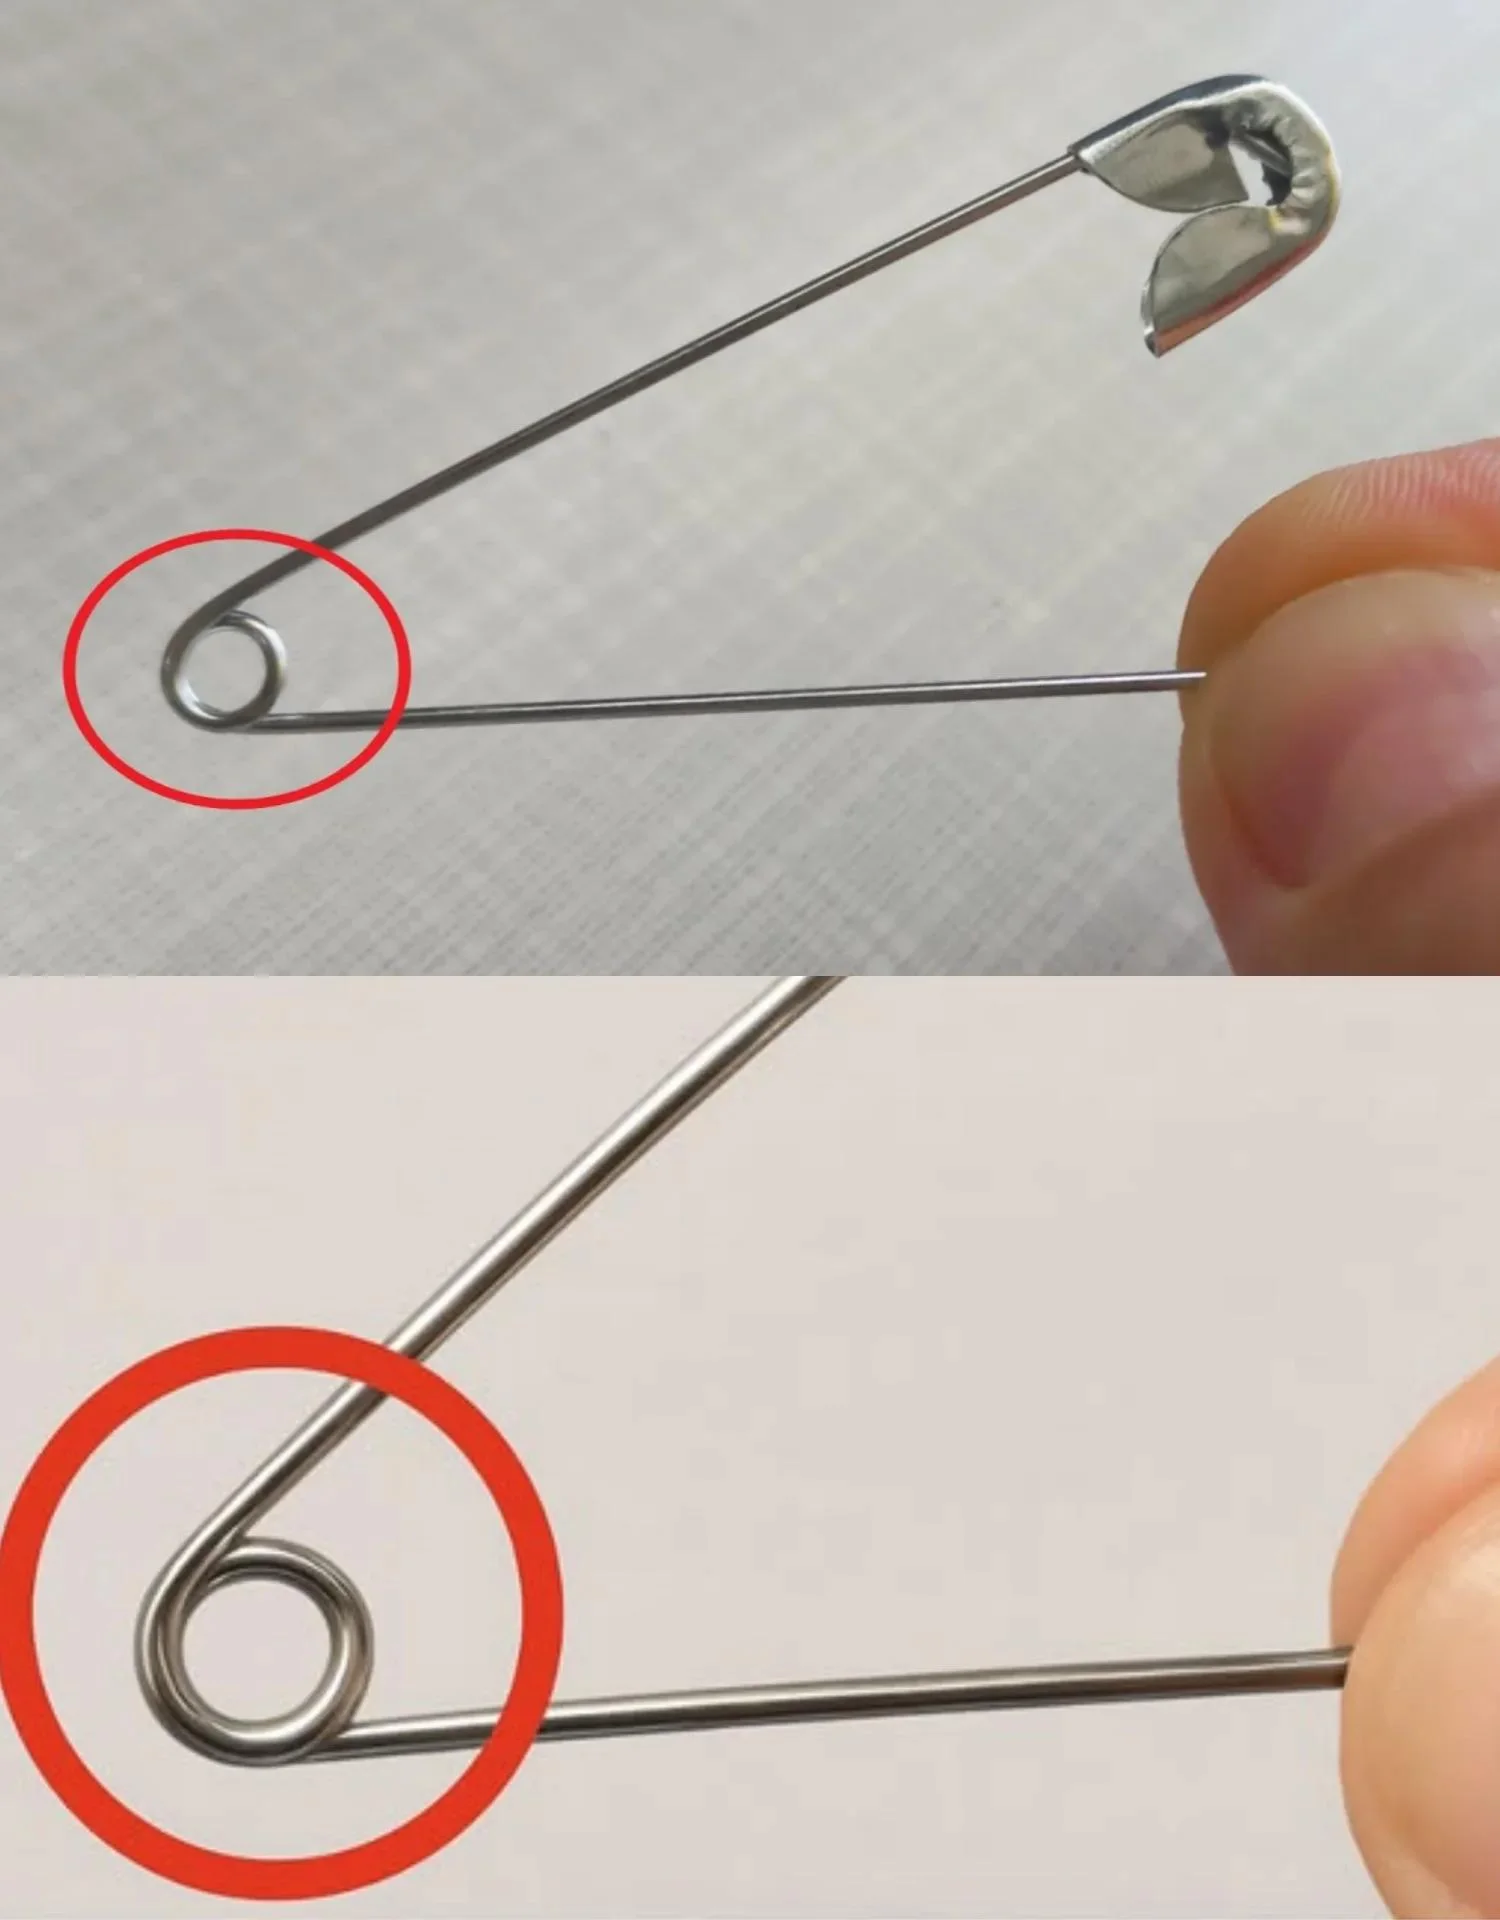
If you’ve ever looked closely at a safety pin, you may have noticed a small, circular hole near the hinge or clasp. While this tiny hole may seem insignificant, it actually has a practical use, especially in sewing, crafting, and clothing alterations.
In sewing, the small hole at the end of a safety pin is often used to thread elastic, ribbon, or cording through a fabric casing—such as when you’re making a drawstring waistband or replacing elastic in a casing. By threading your elastic or ribbon through the hole, then closing the pin, you can safely guide it through tight spaces without risk of the pin opening or slipping.
This clever technique is a staple among home sewers, costume designers, and textile instructors, who frequently use safety pins as a handy, low-tech solution for manipulating fabric without specialized tools.
(Sources: Craftsy, Threads Magazine, Sewing.org)
Vintage Sewing Tips That Are Still Amazingly Useful
As modern sewing continues to evolve with digital machines and automated cutting systems, many traditional sewing techniques are making a comeback. These methods—used for decades by home sewers and professional tailors alike—offer reliable, inexpensive, and low-tech ways to solve common sewing challenges.
Below are time-tested tips that can make your sewing faster, stronger, and more efficient, especially for beginners or those working with limited supplies.
1. Use Beeswax to Strengthen and Condition Thread
Beeswax is a classic sewing tool that often gets overlooked in favor of synthetic thread conditioners. Running your thread through a small block of beeswax:
- Prevents tangles and knots
- Reduces fraying during hand-stitching
- Strengthens thread, especially for buttons and seams under tension
Once the thread is coated, a quick press with an iron sets the wax, making it more durable. Beeswax is particularly useful when sewing on heavy fabrics, such as denim or canvas, where strong thread is essential.
(Sources: Martha Stewart Living, Sewing.org)

2. Mark Fabric with Dry Soap Instead of Tailor’s Chalk
A bar of dry white soap can be an excellent substitute for tailor’s chalk. It leaves clear, removable marks, is cost-effective, and works well on most fabric types.
Advantages of using soap:
- Easily washes out
- Doesn’t leave residue or stain
- Glides smoothly across fabric
Many experienced sewers use dry soap slivers to mark pleats, darts, or hems on both light and dark materials. It’s especially handy when working on delicate fabrics that might be damaged by harsher marking tools.

3. Backstitch to Secure Seams
The backstitch is one of the oldest and strongest hand-stitching methods. Even if you’re using a machine, it’s a good habit to manually backstitch at the start and end of a seam.
Benefits of the backstitch:
- Prevents unraveling at seam edges
- Reinforces high-stress areas like underarms or crotch seams
- Great for hand sewing repairs or when a sewing machine isn’t available
Many sewing instructors recommend mastering this stitch early on, as it’s not only reliable but essential in garment construction.
(Sources: Threads Magazine)

4. Pin Diagonally for Easier Fabric Handling
When pinning fabric before sewing, placing pins diagonally (at a 45-degree angle) offers better grip and makes removal easier as you sew.
This technique:
- Helps stabilize fabric layers, especially during curved seams
- Prevents shifting or bunching
- Allows you to sew over pins more safely with a machine (though removing before stitching is still recommended for safety)
Diagonal pinning is commonly used by quilters and couture seamstresses to maintain fabric alignment during intricate construction.
5. Make Strong, Clean Knots with a Needle Wrap
When hand-sewing, tying off your thread neatly can be tricky. A fast and efficient method involves:
- Holding the thread near the fabric
- Wrapping it around the needle 2–3 times
- Pulling the wraps down toward the fabric as you push the needle through
This creates a tight, nearly invisible knot that won’t unravel. It’s particularly useful for securing buttons, hemming garments, or finishing embroidery work.
6. Thread a Safety Pin Hole to Guide Elastic or Ribbon
As mentioned earlier, that small hole in your safety pin isn’t just a design detail. Thread your elastic, cording, or ribbon through the hole, secure it by wrapping the end, and use the pin as a guide tool to push your material through a fabric casing.
This trick is perfect for:
- Elastic waistbands
- Drawstring bags or hoodies
- Replacing stretched-out elastic in fitted garments
Using a safety pin eliminates the need for more expensive bodkins or specialty tools and works equally well in children’s clothing, accessories, and home decor projects.
(Sources: Sewing.org, Craftsy)
Why These Time-Tested Sewing Hacks Still Matter
In the world of DIY fashion and sewing, not every solution requires high-tech equipment. Often, the most effective techniques are those passed down through generations—simple, practical, and grounded in the fundamentals of craftsmanship.
These traditional methods:
- Encourage resourcefulness
- Improve seam quality and garment durability
- Make sewing more enjoyable and approachable, even for beginners
By incorporating these tips into your next sewing project, you can elevate your results with minimal cost and effort.

Conclusion: Embrace the Wisdom of Old-School Sewing
From beeswax-coated thread to the clever use of safety pins, these tried-and-true techniques prove that some of the best sewing solutions are still the simplest. Whether you’re repairing clothes, designing your next outfit, or sewing for fun, these vintage tricks offer reliable results and a connection to the craft’s rich history.
So the next time you pick up a needle, don’t forget the lessons that have stood the test of time. Sometimes, a tiny safety pin hole is all it takes to keep your project moving forward with ease.